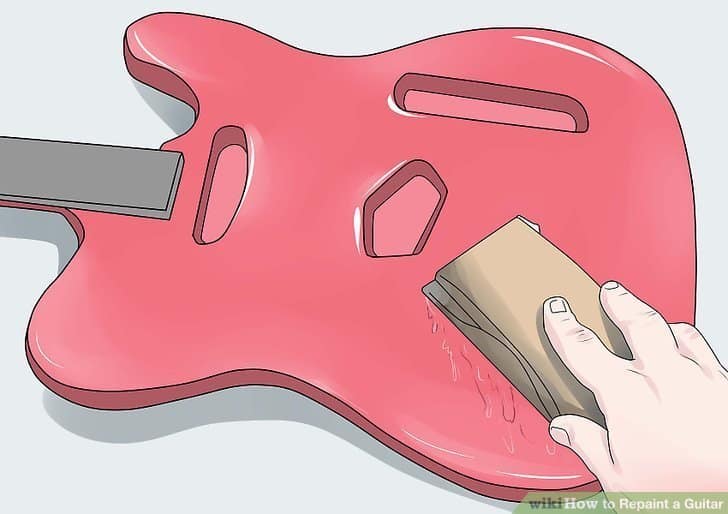
Answer 1 of 3. Use 320-grit sandpaper for sanding the entire body of the guitar gently.

Pin On For The Home
99 of the work in doing a good job on any refinishing is definitely the prep work.

. This means unscrewing the bridge removing the strings the neck if possible and anything else on your guitar body. You then must make sure your guitar body is clean so wipe it with a damp cloth and let it dry. It would be best to degrease again allow to dry then commence with the new paintjob.
Factory poly flashes off ALL of its solvents within 24 hours and just becomes a thick plastic finish on the guitar. Last of all for satin look put a few coats of paint on sand it smooth and fine without going thru then one coat two max and be done. Unwind each string until it is loose enough so you can remove them from the pegheads.
Paints will adhere properly to a properly prepped surface. Apply A Clear Coat. Leave the base coat to dry for 30 minutes or so before doing the second coat.
You can repeat this process around 3 or 5 times with 20-minute intervals in between. 7 Spray Painting for Day Two Now put a backing pad on a level surface and keep the guitar. Do not do this inside.
Then go ahead and add another layer. Youre going to want to work over the entire body of the guitar with a medium grit sandpaper 120 grit and go back over again with the entire body and use an even finer grit of paper 220 grit. Start with the strings.
On contours use a flexible sanding block. To achieve the best results sand it all down. Re-painting wont work so sand the clearcoat off before you re-paint and dont be lazy and lazy.
Step 1 - Clean and Prepare Before you remove paint from your guitar remove the hardware to get it out of the way. You should always sand with the grain and not against it. Then just follow his steps on how to put a finish on the guitar and polish and you should be fine.
Im Brad and I make how-to videos. Poly is resistant to oils sweat water moisture pretty much everything. You can over-spray into the pickup cavities and neck pocket.
Store the screws together with the corresponding hardware ie. If you dont sand the whole surface evenly itll look uneven and the paint may peel off. Keep the sanding block level.
Vacuum up your mess Image from WikiHow. You will find it a great deal easier to apply thin and even layers. After this you will apply 4 layers of the paint color you wish sanding down with 320 grit between each layer after its dry to smooth any drips.
You can then take the bridge s off if they are held by the strings. The screws from the pickguard taped on the back of it. Part 2 Disassembling the Guitar Download Article 1 Turn your guitar controller over onto its face.
After the first layer let the primer dry for at least 20 minutes. Read customer reviews find best sellers. Ad Browse discover thousands of brands.
Dont worry about the neck and headstock for now. When sanding curved edges only sand in one direction. That will leave it with a satin finish.
No need to mask anything off. You basically want to turn the gloss surface dull. After this apply 8 layers of clear gloss to the guitar.
Stay away from automotive primers and wood. If that doesnt work use a methylene chloride-based paint remover. Put some on a cloth NOT a paper towel and wipe firmly.
Zip Strip is one brand. This will ensure better curing. Use the AutoZone duplicolor in quart cans it is already diluted and is professional grade stuff.
Find deals on guitar conductive paint on Amazon. You may have to cut the strings with pliers to get them off thats why you should have a new set. I would recommend following the wood preparation steps with the primer and wood filler and sanding then paint on with guitar paint or acrylic never tried acrylic should be fine as long as you dont just paint it on there and let it dry.
Take photos of the whole guitar and the details before you take it apart and get some small containers empty cans boxes cups or whatever to store all parts during the project. Can You Spray Paint A Guitar Without Sanding. The only steps are to sand the clear with 220 grit and then paint it.
Make sure to carefully sand down with 320 grit between each layer after its dry to smooth out any drips that remain. Before applying the clear coat give the second coat 30 minutes to dry. Follow the instructions but instead of applying it and letting it sit try it the same way as the lacquer thinner-.
Spray at least 3 coats for the best results and once the final coat is dry you can apply a clear coat for that glossy effect. 2 Use the flat-head screwdriver to remove all the screws from the back of the body. You can use a fine grain of sandpaper of to smooth out the wood on the guitar.
When spraying make sure to keep the nozzle of the can around 8 inches away at all times. Also dont worry that the screws are star-shaped. Keep a 90-minute break between each coat.
Use a non-flexible sanding block to ensure a level surface. Lets do one coat and then a light 320 sanding an hour or so later then repeat. I do custom painting projects guitar painting airbrushing spray can painting wood working and a variety of.
Two to three clear coat layers will make the paint scratch and weatherproof. Check your work frequently and maker sure you eliminate all shiny spots otherwise the paint will flake off rapidly. Taking the Guitar Apart.
Let it dry overnight. You could do it on a calm day by making a hook out of a coat hanger that will hang in a window opening and spray it out the window. Allow the first coat to dry for about half an hour before applying another coat.
Then move it to your bathroom to hang on the shower curtan rod. 2 Guitar Disassembly 21 Take Off the Guitars Neck 22 Remove Other Hardware 23 Remove the Existing Finish 3 Use Grain Filler 4 Ascertain the Kinds of Paint Youd Like to Use 5 Before Painting 6 Painting the Guitar 7 Applying Clear Coat. Then scuff the surface lightly with a fine grade scuffyscouring pad.
If you do not sand the paint it will adhere to the surface. Check here to find the best spray paint for guitar. Apply the second coat until the old coat is completely invisible.
Also have handy a small tray to hold screws. Use at least 3 grades of sandpaper prior to painting rough medium and fine. With a little luck you can find shellac in a spray can.
You can paint it on with a brush wipe it on with a cloth pad or spray it if you have a compressor and spray gun. You get the idea.

How To Make A Painted Pineapple Ukulele Crafts Handmade Ukulele Art

How To Chalk Paint A Guitar Zero Skill Required Youtube

3 Ways To Repaint A Guitar Wikihow

How To Repaint A Guitar A Killer Guitar Rigs Ultimate Guide Killer Guitar Rigs

Ukulele Diy Kit Never Insult A Ukulele By Calling It A Small Guitar Petite In Stature Yes But Big On A Violoes Pintados Violao Customizado Arte Do Ukulele

How To Custom Paint Your Electric Guitar With Pictures Wikihow
How To Properly Repaint Your Guitar A Step By Step Guide Guitar Space
Coco Lele Day Of The Dead Dia De Los Muertos Hand Painted Ukuleles Personalised By Coral Flamingo Gitarre Malerei Musik
0 comments
Post a Comment